Web EDI Transaction Basics
Creating and sending transactions on the web are consistent across transaction types, lets dive into the basics.
All transaction types share a common header format and edit mode actions. They also share common patterns that we will go over in this guide.
Transaction Summary
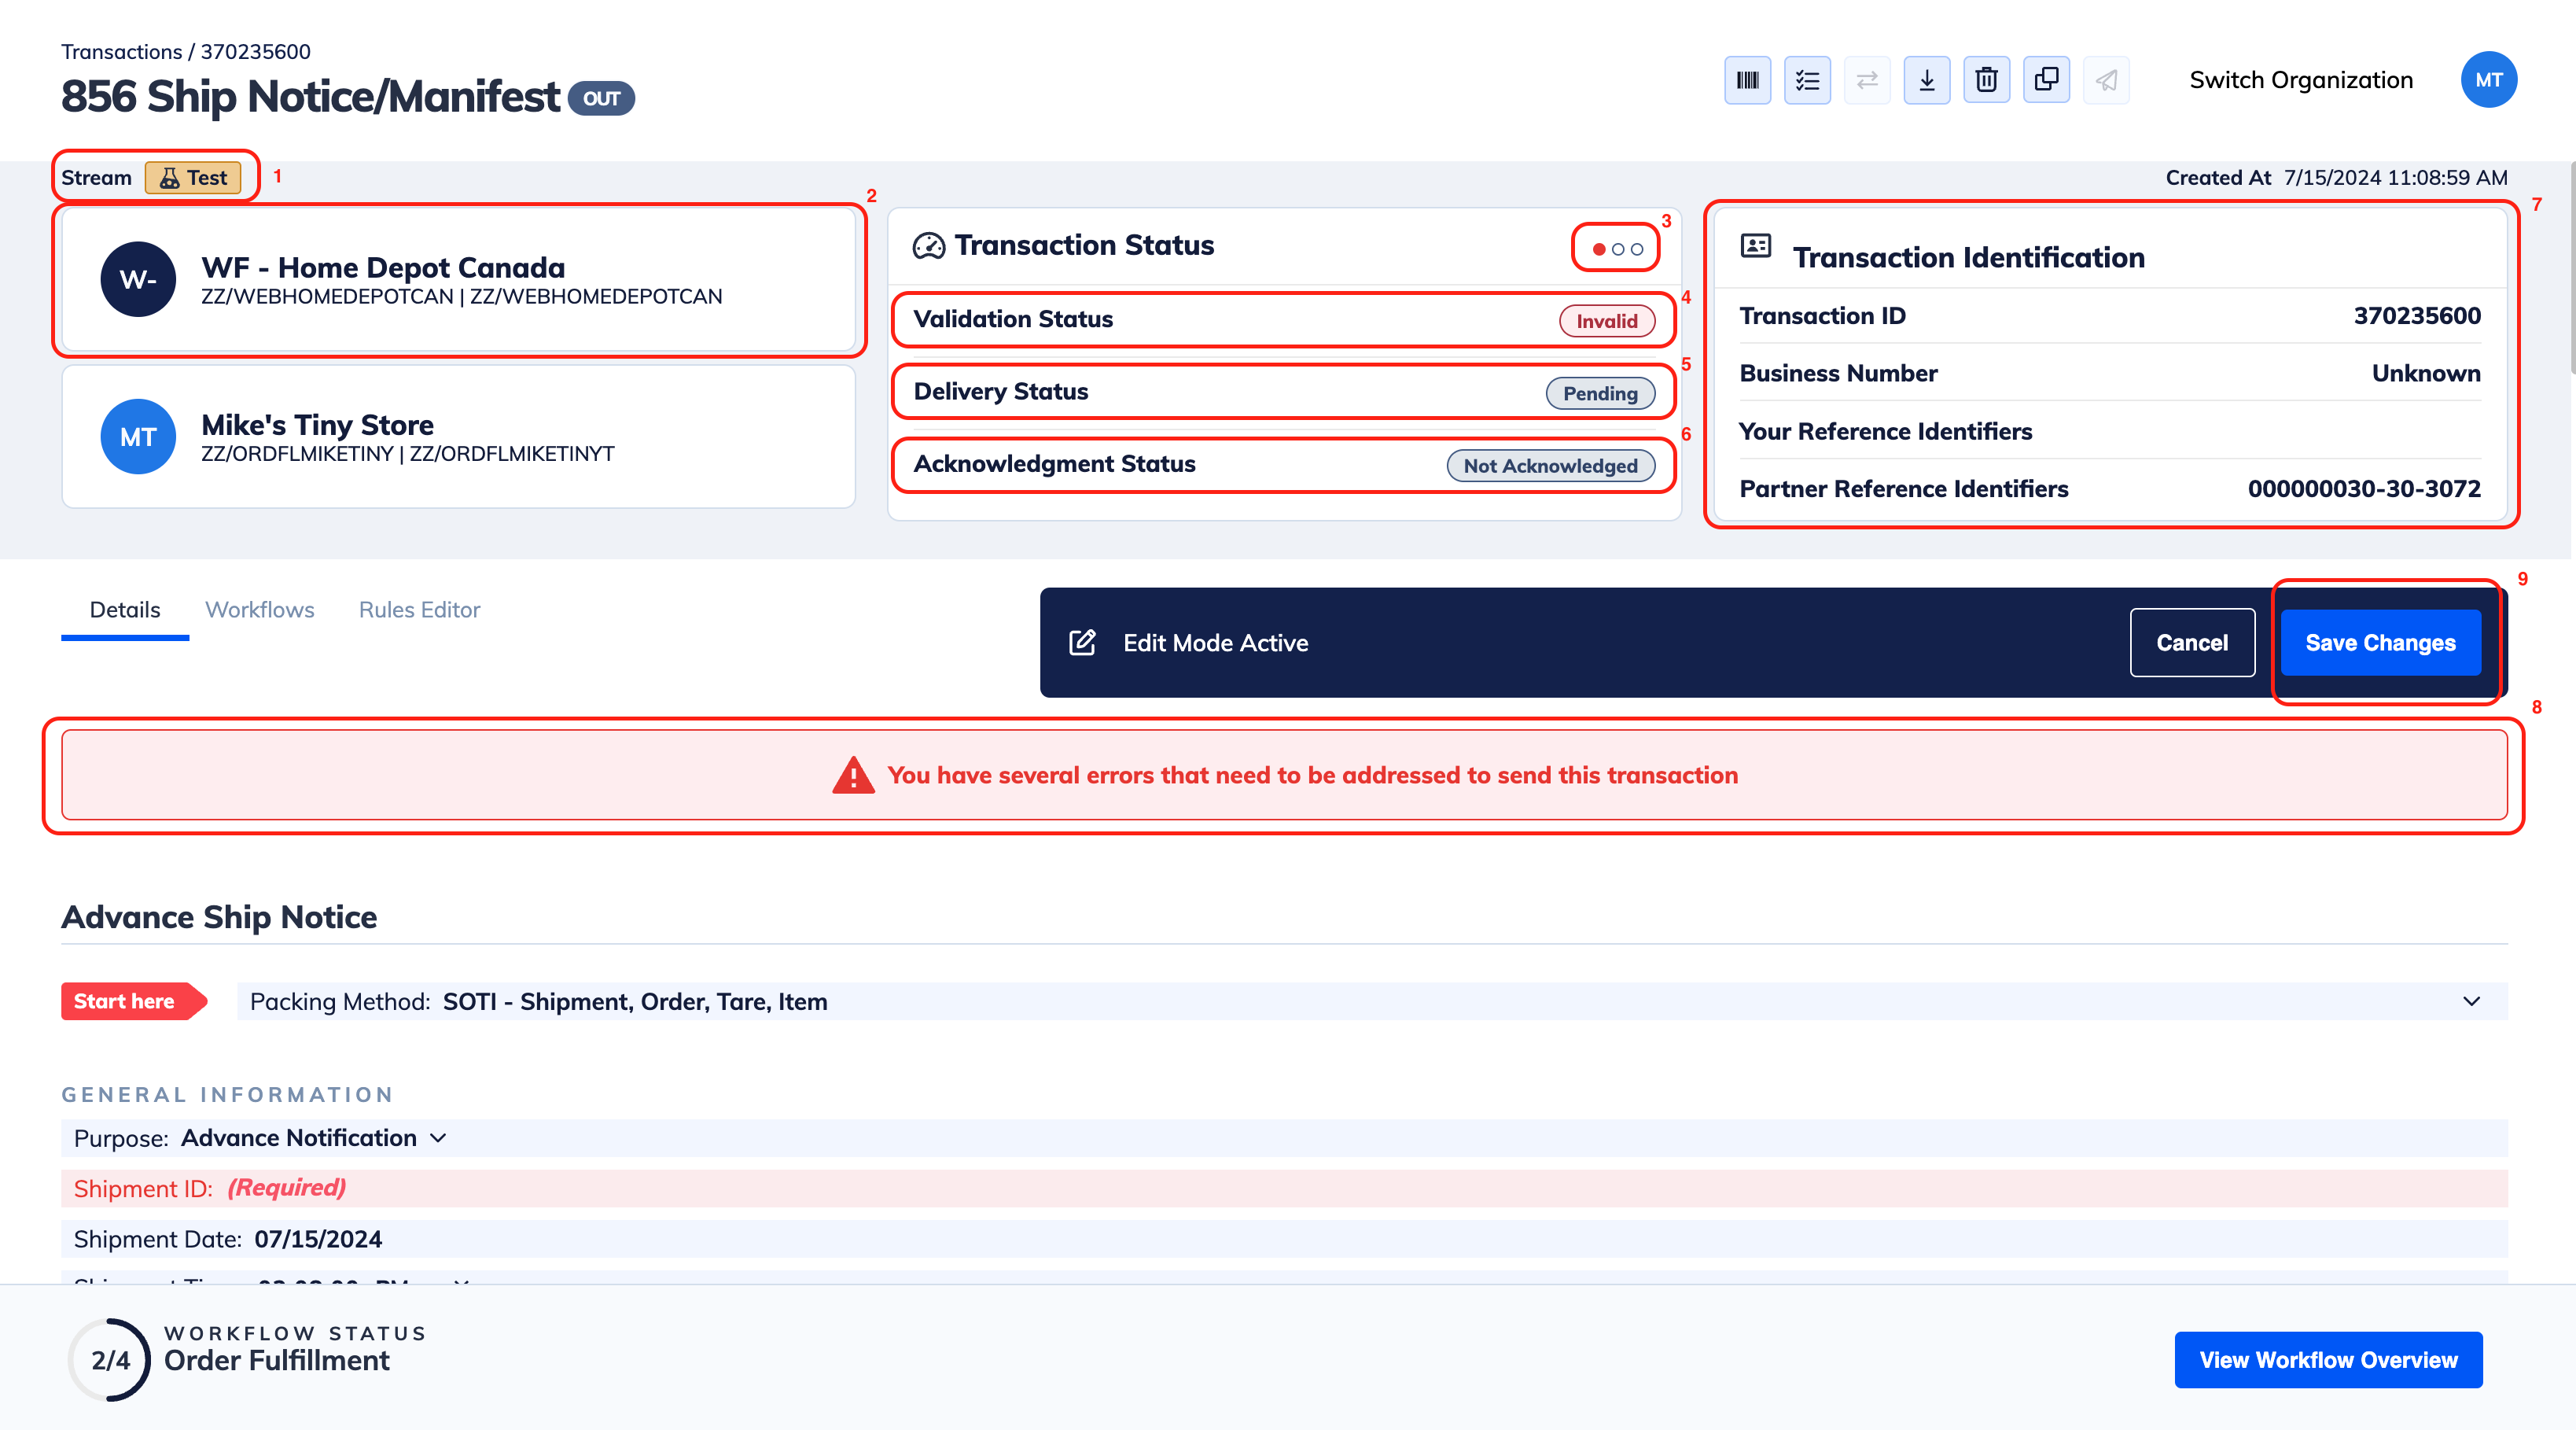
The following numbered sections represent the following:
- The stream the transaction is being sent in (Test or Production). Test transactions are common when testing your EDI setup with a buyer, while Production transactions occur when you are trading with real data and orders are being fulfilled.
- This is the recipient of your EDI transaction, in this case, the buyer of goods (Home Depot Canada) buying from Mike's Tiny Store. Each sender and recipient has their respective EDI ISA IDs and Qualifiers on their respective cards.
- These three pills can be white, red, yellow or green.
- White: The step is not yet taken.
- Red: The step is not yet valid or was rejected
- Green: The step is successfully complete
- Yellow: The step is overdue and something may be wrong.
- Validation status indicates whether or not the transaction is currently in an acceptable state for sending to the buyer. Each buyer indicates the mandatory segments and elements that must be present for a transaction to be valid. In order to make a transaction valid you must fill out all the mandatory fields in the document.
- Delivery Status indicates whether or not the transaction was successfully delivered (sent) to your partner's ISA ID.
- Acknowledgement Status indicates whether or not the transaction has been acknowledged by the receiving party, and they have sent back a 997 to your ISA ID to acknowledge receipt.
- This card indicates important identifiers for the transaction, like the Orderful transaction ID you can use when inquiring with ORderful support about a transaction issue, and the Business Number, which is used to identify the transaction number used by you or your buyer. This could be a Purchase Order, Shipment, or Invoice Number.
- The error banner will persist in the edit view of a transaction until all of the required fields of your EDI document are completed and changes saved.
- The 'Save Changes' button will save all the changes you have made to the document.
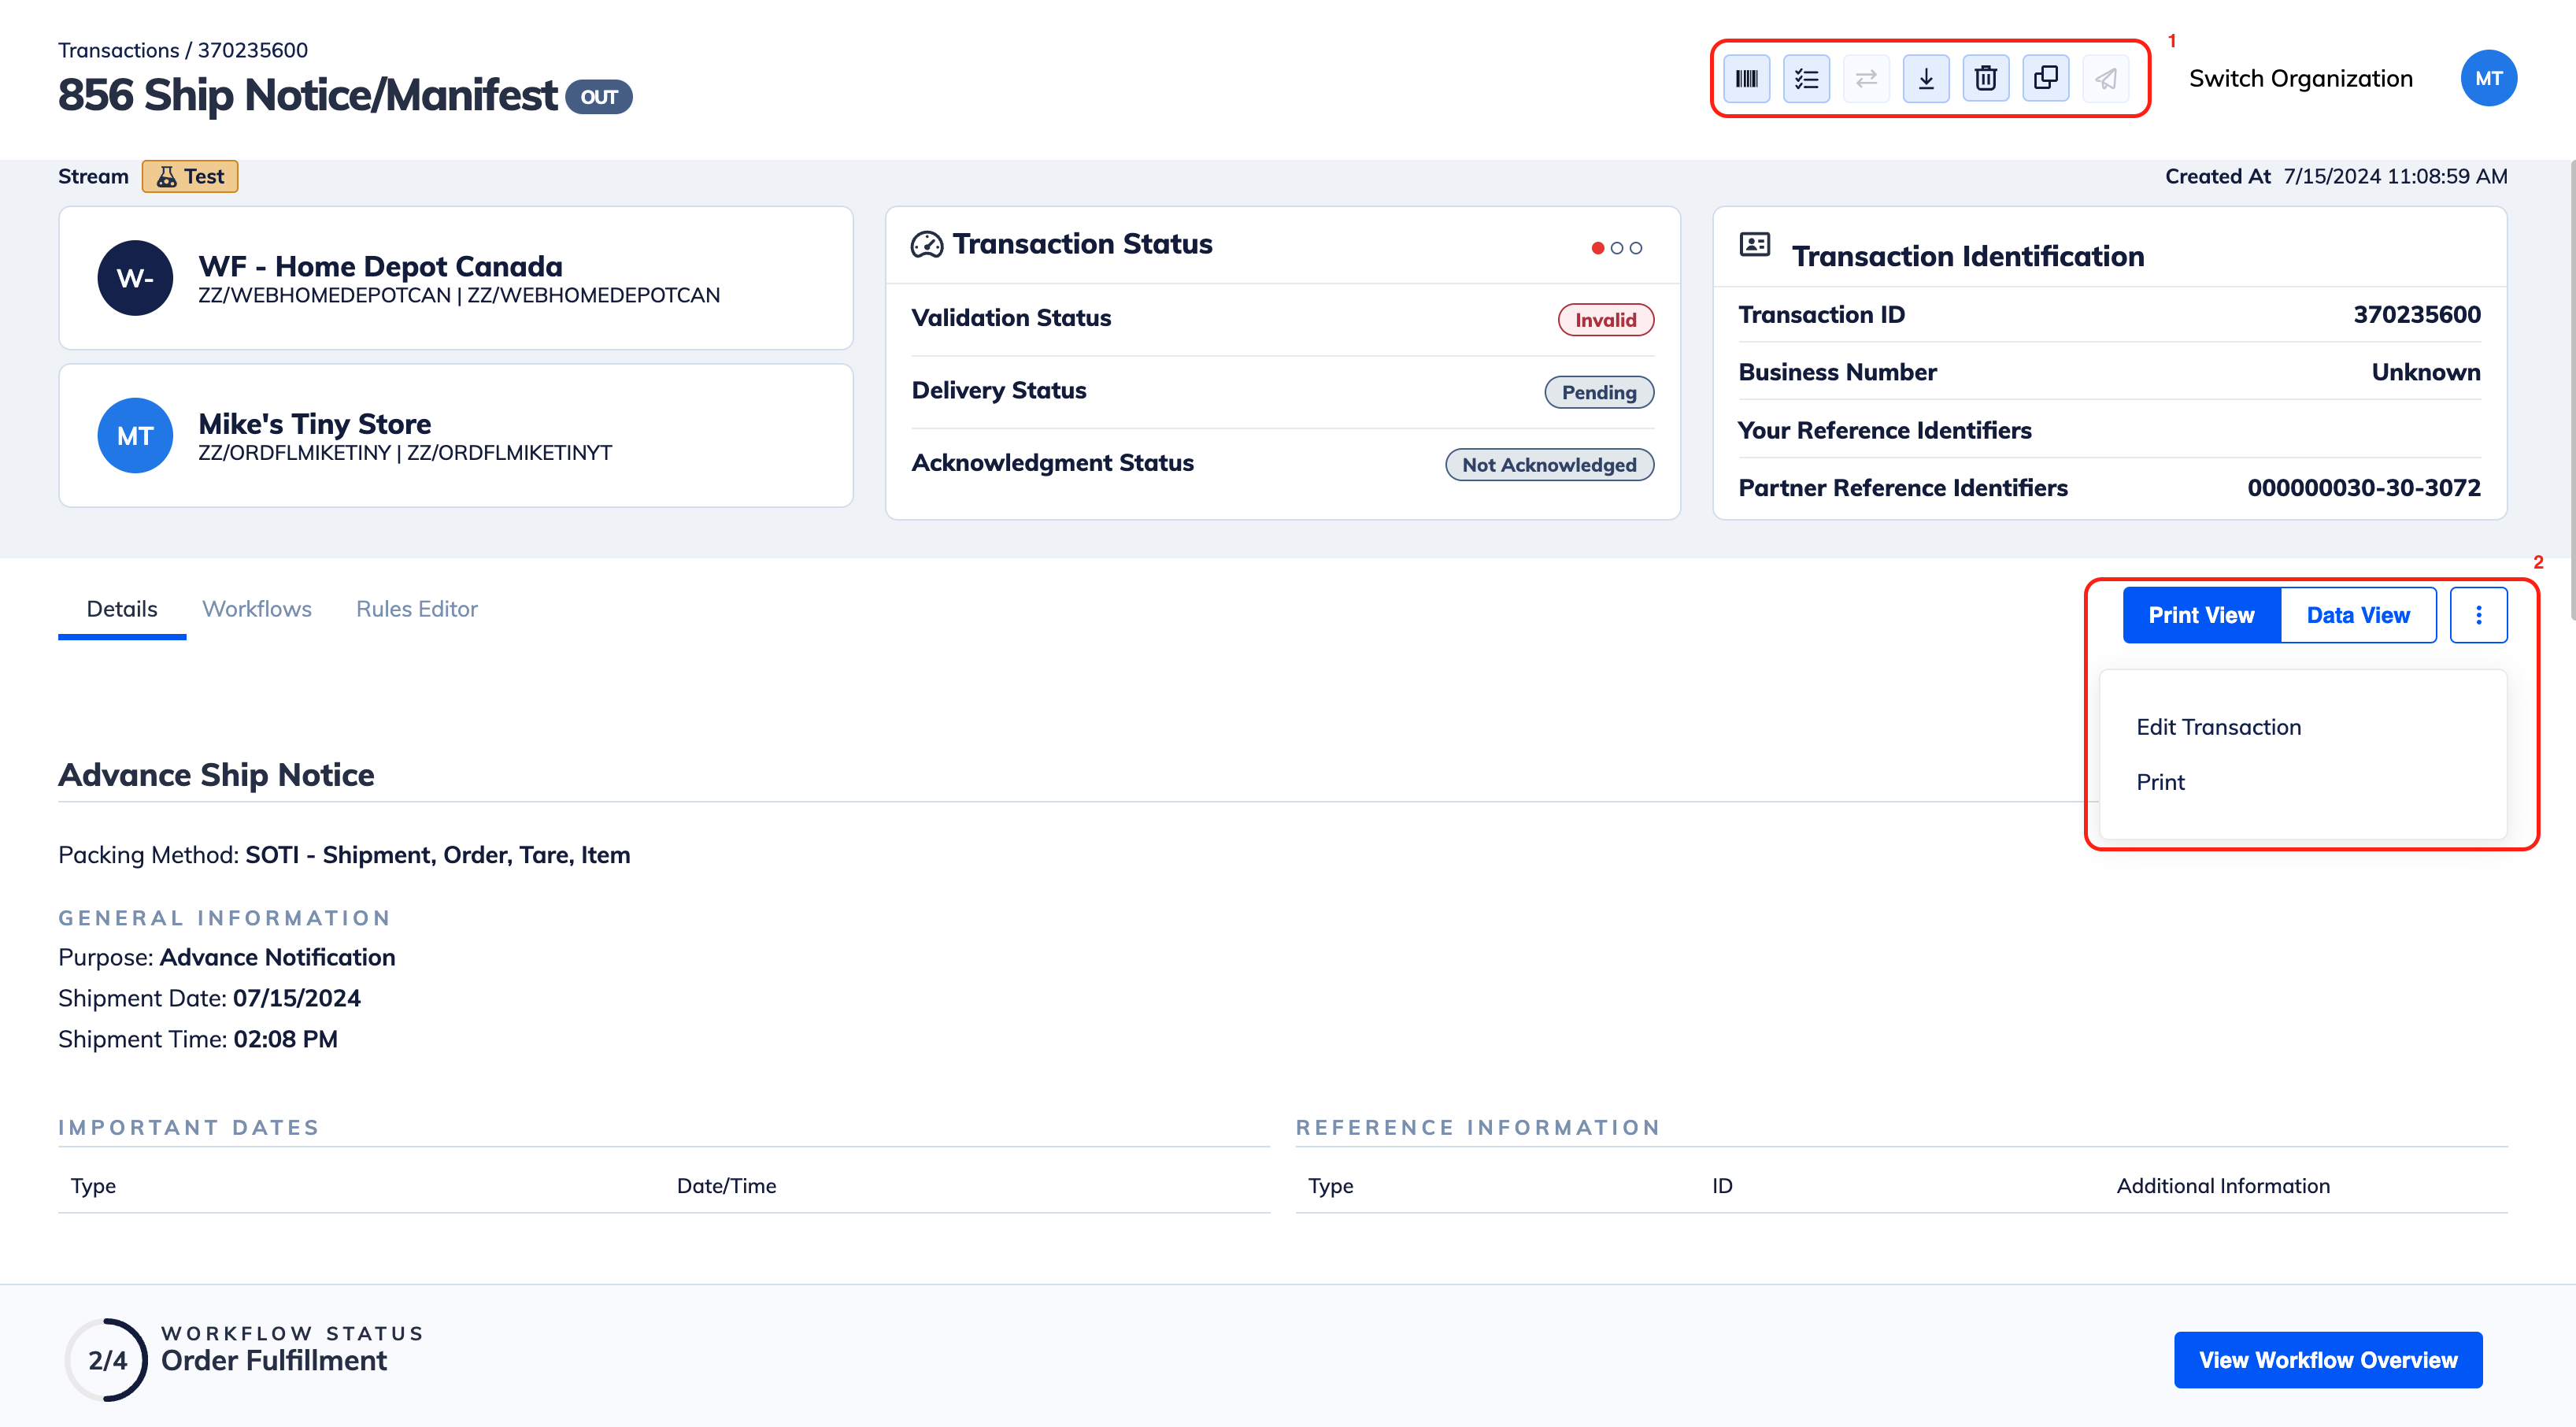
Transaction Toolbar
Once you have saved a transaction you can see the final "print view" of your document along with:
- A toolbar with several actions you can perform, including Download (), Delete (), Audit Trail (), Generate Labels () (856 only), or Send () it to your partner.
- You can print, or continue editing the document, or view the raw "Data View" of the transaction.
Transaction Body
The main body of a transaction is where you will be required to fill out information that your Trading Partner has been made mandatory. Your goal with each transaction will be to fill out the required elements request and save your changes to create a valid transaction.
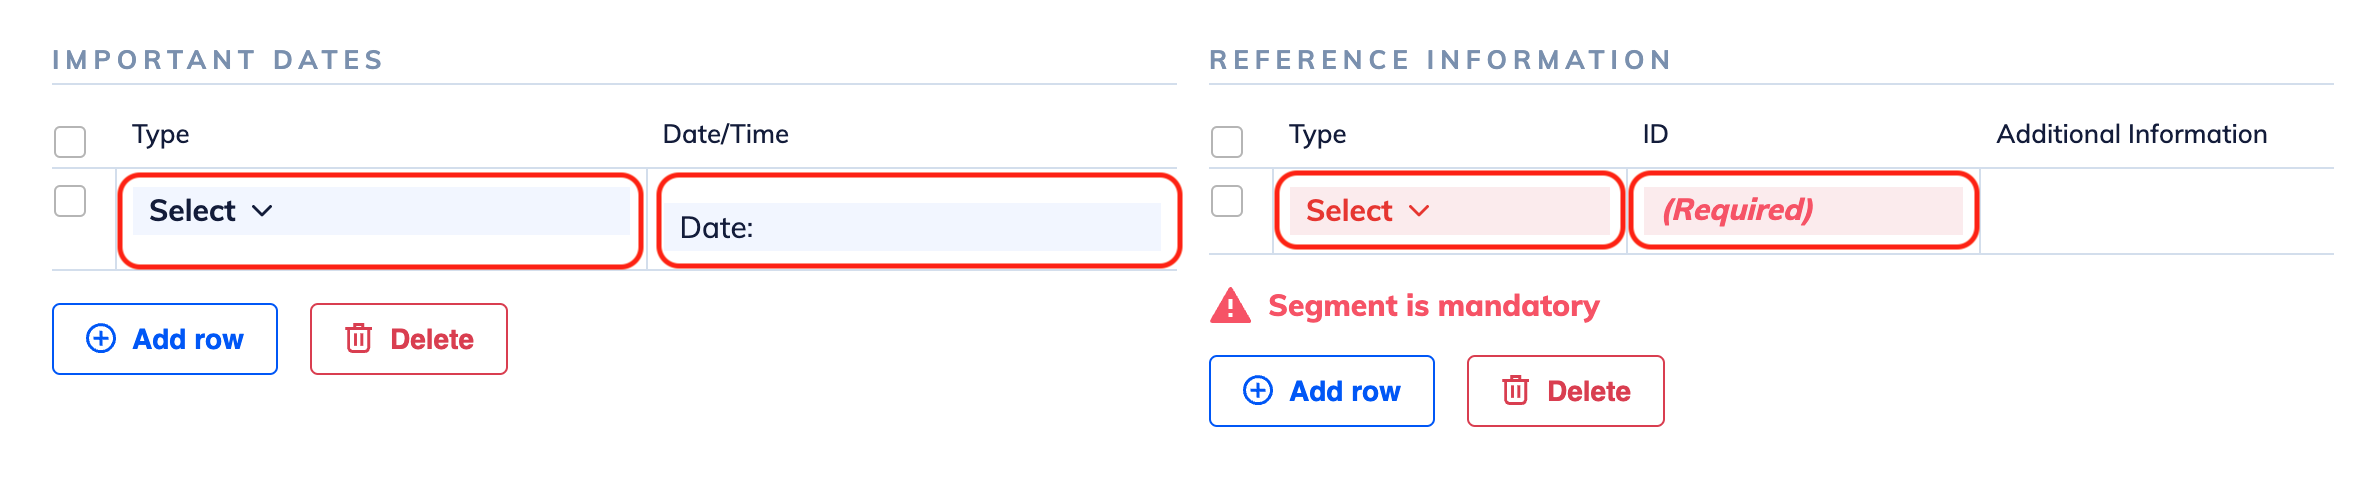
Segments
Each Transaction will have a grouping of fields you may be required to fill out called, a grouping is called a Segment.

Transaction Form EtiquetteTo be compliant with your partner's Guideline you only need to fill out the mandatory elements marked in red on the form. You can optionally provide more details if warranted but they are not mandatory.
Elements
Within each Segment you will fill out the required Element that is highlighted in red. You can validate a transaction by filling out all the required elements and saving your changes. Once you produce a valid transaction, you can send it to your partner.